This is about lofting the a 10 ft. Herreshoff Pram. I chose this plan for its simplicity and when built of well chosen materials will be a classic pram finished fancy with varnish. I became aware of this pram while reading John Gardner’s “Building Classic Craft”, a book I have had for many years and have enjoyed reading Mr. Gardner’s descriptions of the many varied small craft and learning of their origins.
The pram will be traditionally built with cedar lapstrake planking over steam bent oak frames. This planking will likely be of Northern White Cedar which was traditionally used at the time these boats were built and in service in the Northeast part of the country in Herreshoff’s period. I haven’t built a boat from descriptions and plans contained in an article previously but the plans look complete and offer detailed information of the boats construction thanks to the expertise of Mr. Gardner.
The building begins in my modest shop and I start with Lofting. For those not familiar with lofting, I imagine most readers of this blog are amateur builders, it is the process of drawing the lines of the boat on the floor in 3 views. The views are “Half Breadth”, “Profile”, and the “Body Plan”. Once the process is complete there will be “developments” that will provide patterns or templates for the various parts of the backbone (transom, keel, skeg, keel batten, sternpost, and knees). In this pram, there is no stem and because of that, the lofting is considerably easier.
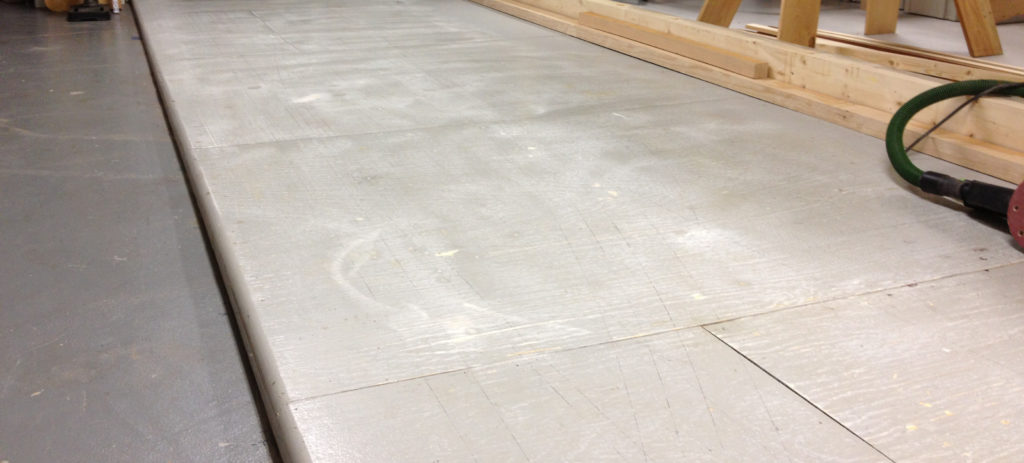
Here is a photo of the shop floor that I recently cleaned and painted fresh for this project. In the space to the right I then stapled to the floor about 1 and 2/3rds of another sheet of 1/8″ luan plywood, or “doorskin”. Most lumberyards carry this material. The sheets were carefully laid down and butted end to end, then stapled around the outside edge and at the butt seam to hold it in place. For simplicity, I asked the lumber yard to rip a 1 1/2″ piece from the edge of 2 sheets that I would add to the base of the surface to serve as my “baseline” during the lofting. Once the doorskin was fastened smoothly and carefully to the floor, I then applied two coats of Kils Primer to provide a nice bright surface for the lofting to be done in pencil. The luan will absorb the paint readily and that is why 2 coats were used and suggested. The Kils product dries fast and you can be lofting in a short time, although I let the paint set overnight.
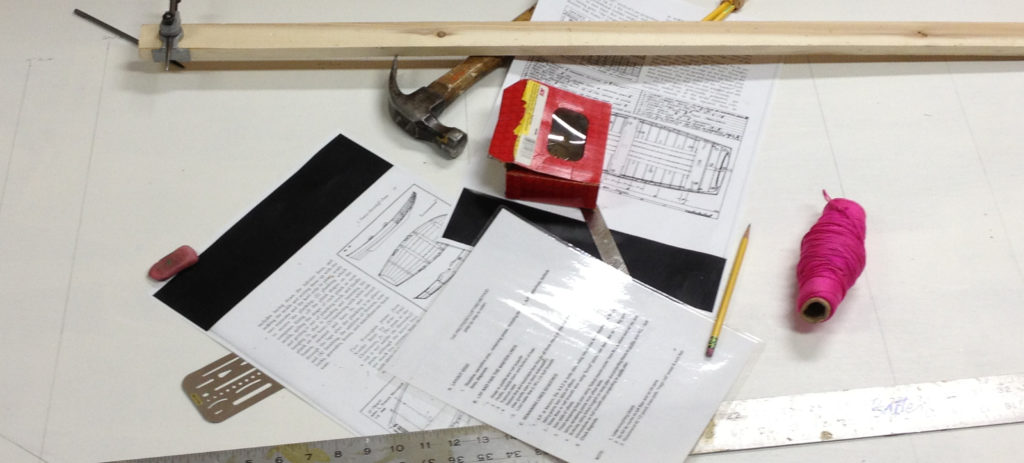
Basic Lofting Tools
The tools for lofting are simple and here are a few basic suggestions:
1. 3′ or 4′ straight ruler found in most art supply stores.
2. Trammel points for establishing perpendiculars in the lofting (8th grade geometry).
3. A hammer, some finish nails 3d or 4d, some straight battens from pine or other suitable softwood.
4. A carpenters line for establishing a straight line for the baseline of the lofting.
5. Your plans including the table of offsets and lines plan.
6. Pink Pearl eraser, I prefer #3 pencils as they result in crisp lines, less sharpening, and fewer nasty smudges which you want to avoid.
The first task is to draw a baseline nice and straight the length of the lofting. To do this I tack down a line pulled taut and elevated at the ends by about 1/2″. I then use a tri-square to project the line carefully down onto the loft surface. Do not try to use a chalk line under any circumstances. Once the base line is down, then tack the edges I had ripped off the full sheets with the factory edge on the baseline. Staple in place precisely on the baseline and Voila’, you are ready to begin the lofting.
If you are new to the lofting process, read Allan H. Vaitses’ book Lofting for a good background study on lofting. At this point, the process begins with laying down the “Grid” on the loft surface. The grid consists of perpendiculars, waterlines, butt lines, and diagonals, all according to your specific plans. Make sure these are carefully drawn. The perpendiculars must be accurate and all lines clean and crisp for the best results. I prefer to use a #2.5 or a #3 pencil along with a good pink peal eraser and eraser shield to keep changes neat and clean.
The Grid
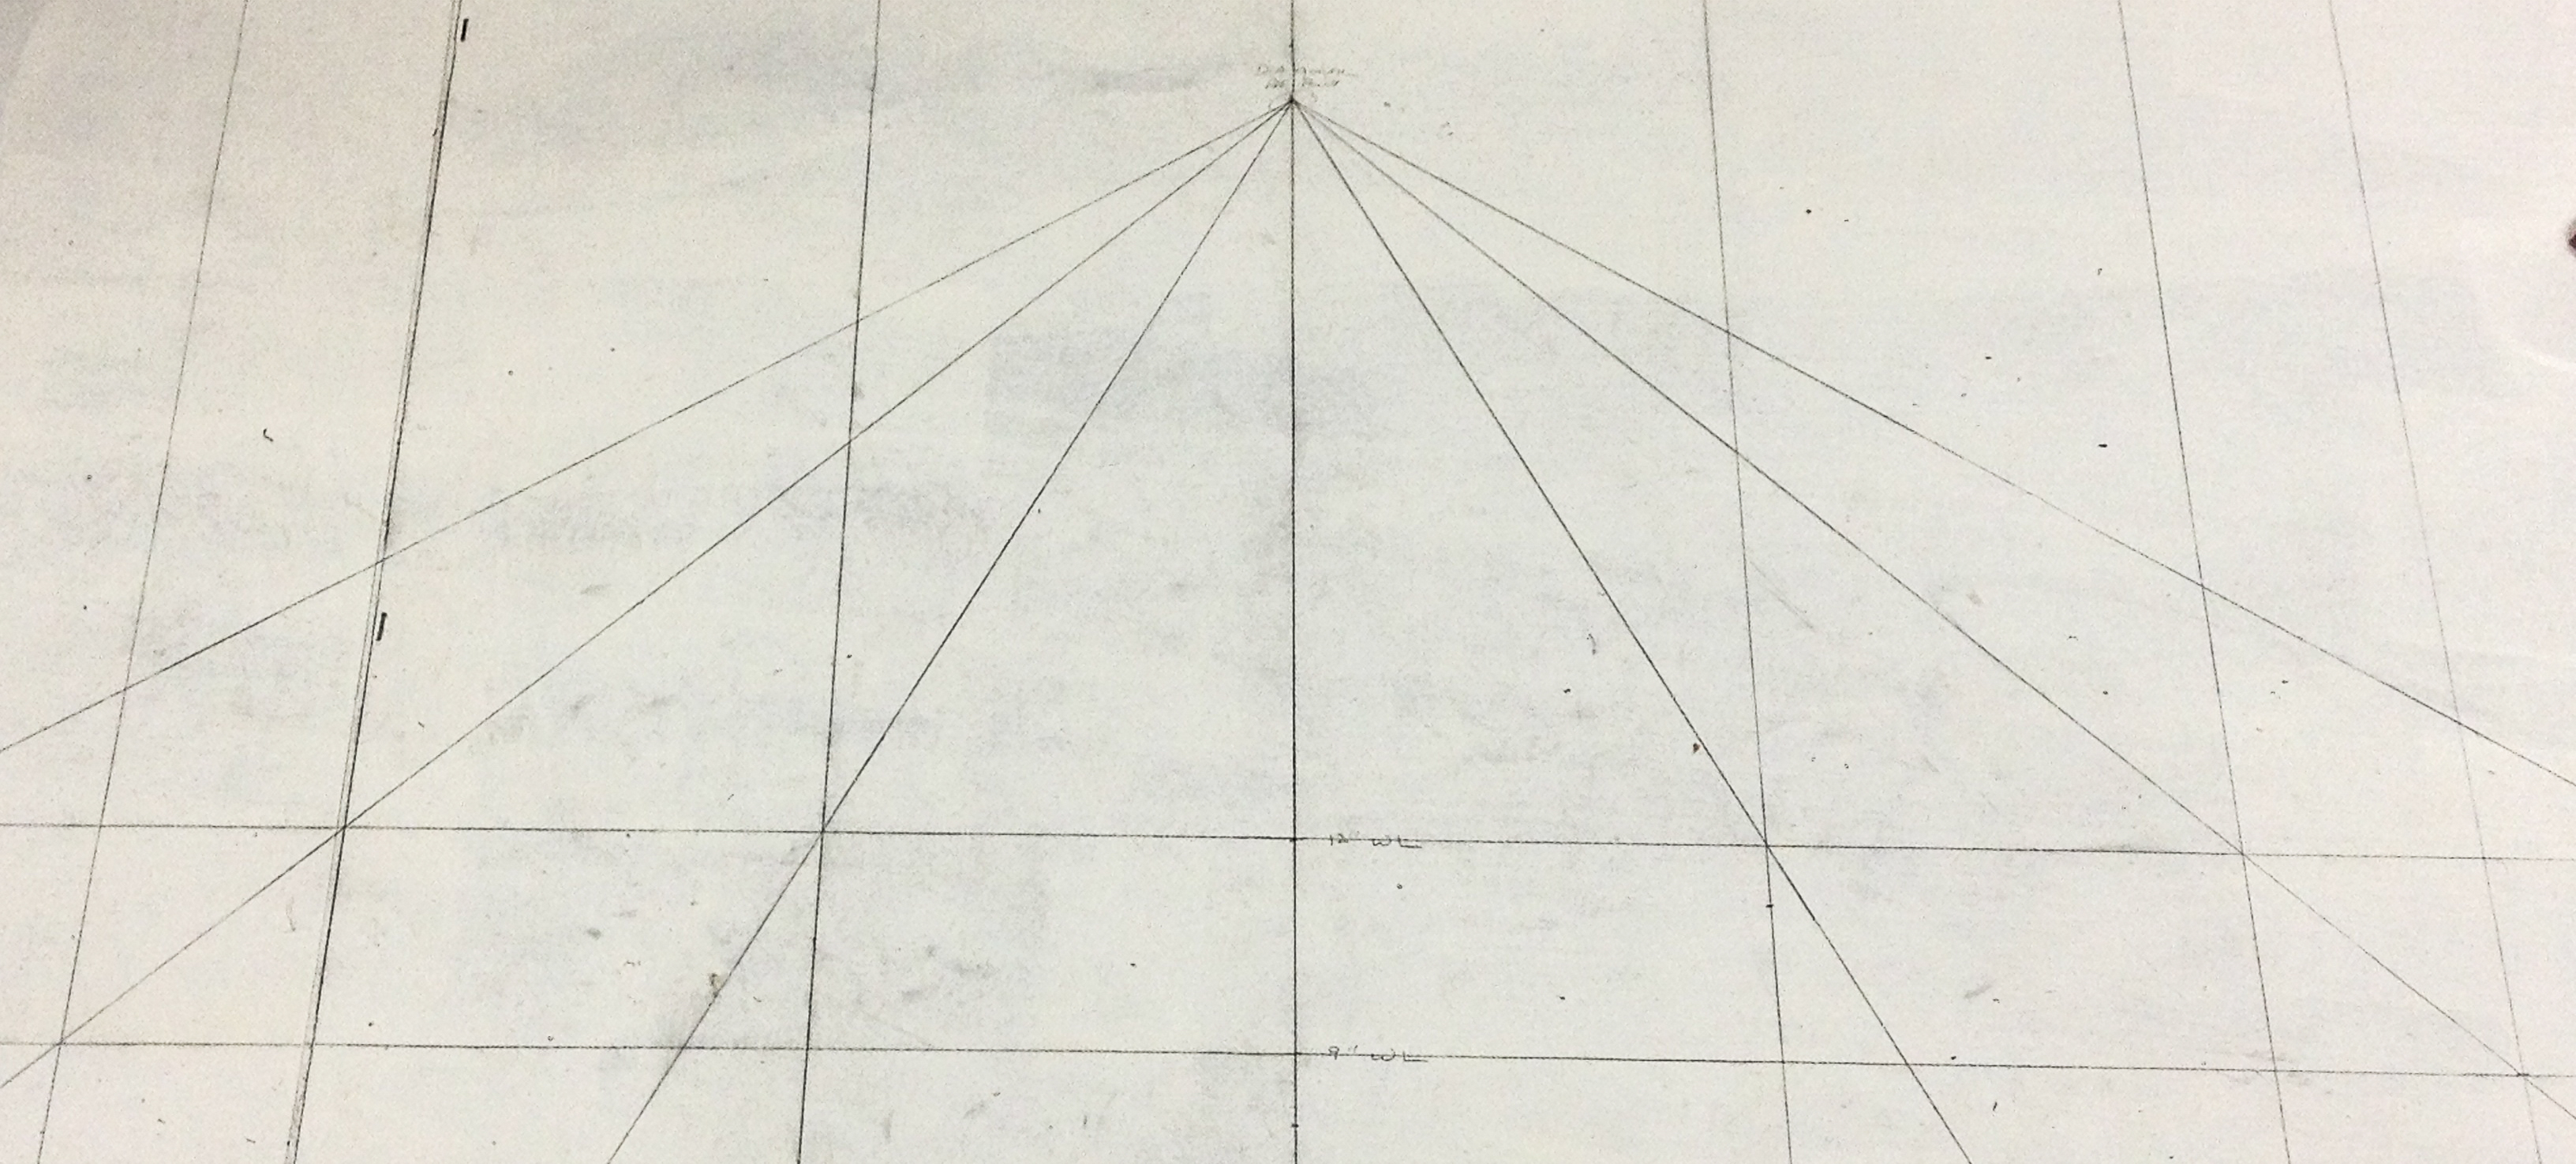
Above is a rather sorry photo of the grid, but you will see the center perpendicular place at the station near amidships, the butts (perpendiculars) in the body plan, the waterlines and butts in the half breadth view. My intent is to not provide a detailed “how to” process of the lofting but to provide some photo detail and brief descriptions as the work progresses.
To the right is the lofting after a few hours of work. The master lines have been drawn (Sheer in Profile, Sheer in Half Breadth, The bottom or Top of the keel, and the Load Water Line). In addition, the body plan includes the amidship station, in this case station 4. These Master Lines, once faired and drawn, will be the basis for laying down the remaining lines.