Lofting, day 3
The lofting of the long lines is complete. In the picture on the left you see the completed body plan and if you are looking carefully you will see the Butts drawn in profile near the bottom. At the top of the lofting you will see the half breadth view of the Diagonals. I place the Diagonals out of the way near the top because with a small boat, the lofting gets “busy” and the lines become numerous.
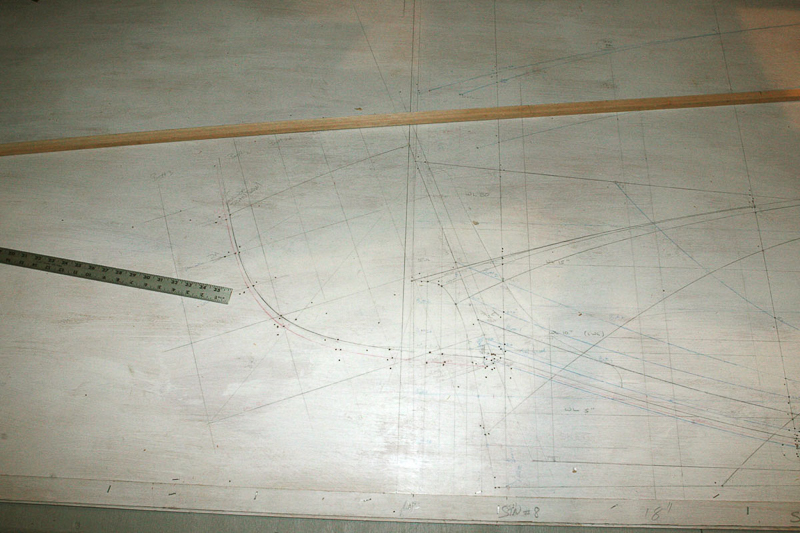
The photo above illustrates the “business” of the lofting. Here is a quick tour. The view is of the aft portion of the profile plan. You see the transom “half breadth” view, the water lines coming into the keel and transom from the right, The aft section of sheer line, and you can see the butt lines. However, what is also going on in this photo is the “development” of the transom. You will see actually two lines depicting the transom, here is where I like to use colored pencils to depict the various faces of the transom. Red is the forward face, and dark blue is the aft face. The bevel can be determined by the spacing of the two lines so that a pattern can now be made and the transom completed. The forward “transom” of this pram is done in the very same way.
I enjoy getting to the Butts and Diagonals because they represent the “Moment of Truth” in the lofting. The Butt lines will be fair if all the body plan is also fair. The same is true with the Diagonals. In this lofting, the Diagonal points in the table of offsets were somewhat unreliable and were only used a fairing points. Some were off as much as 1-2 inches and had to be disregarded. Of course this fact only reinforces the lofting process in getting a nice fair hull.
When examining the Butts for fairness, I did in fact see a “flat spot” in an aft section. I then went back to examine that section in the body plan and sure enough there was a short segment that needed to be about an 3/16″ more full. Fortunately, the flat was confined there and did not require resetting any water lines. The correction was made to the aft section, the butt line was redrawn, and is now nice and fair. Another correction was revealed in one of the Diagonal long lines and that correction was also made without impacting any other lines. Now the lofting of the long lines is complete and I proceed to the expansion of the transoms (Stern and Bow for a pram).
Because there is no view yet in either the body plan, the half breadth, or the profile, it is time to expand and redraw the transoms so we will have a view to give me the actual shape of the transoms.
In the profile view there is the rake of the transom. The expansion begins by using the rake (for a flat transom) as the centerline. The water lines are then projected out perpendicular to the raked centerline. Then the half breadth widths are pick up off the half breadth view and transferred to each respective water line in the expansion. This is done for both the outside or forward face of the bow transom as well as the aft face of the bow transom. The result of these expansions is that I now have a drawing that will provide a pattern for building the transom. Note the somewhat parallel lines describing the outside of the transom. The outer line represents in this bow transom the “aft face” and the inner line represents the “forward face”. The bevels can be determined from these two lines, The pattern can be made, the transom built and sawn to shape on the bandsaw. I your band saw is equipped, as mine is, with the ability to vary your bevel while sawing, then the transom can be sawn to the final shape. The above description is brief but see Lofting a Flat Raked Transom in a book or reference material on lofting and you will see a much more detailed description.
The remaining lofting will be to draw in the Sternpost, the fwd transom knee in order to determine the joinery and fastener placement in these pieces. In addition, the frame placement and floor placement can be predetermined so that information is readily available when the time comes in the building process.
At this point in the process I will begin making the molds, the transoms, sternpost, knee, keel, skeg, and keel batten. The keel batten will serve to fasten the garboard plank to when the planking begins.